 is proud to offer you eFax - the world leader in internet faxing!

1. Sign up for an eFax account
To start faxing online or by email, simply Click Here to sign up for an eFax account.
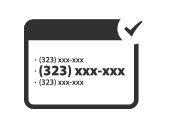
2. Choose your eFax number
Select a toll free, local, or international number to represent your business.
3. Start faxing by email on your phone
Simply attach a fax document to your email and send to: (Recipient'sFaxNumber)
@efaxsend.com
You can pick a new fax number, or move your existing number to eFax. If you want to convey the image of a neighborhood business, choose a local area code. Select a toll-free fax number if you’re expanding your reach or want.
Transform your smartphone or tablet into a full-functioning fax machine with the free eFax mobile apps for iOS and Android. You can receive, edit, sign and send faxes on the go.
When you need to send files that are too large for email, eFax has a simple solution. Just log into your eFax account, enter your recipient’s email and then upload your files — up to 3GB per send. Your recipient gets an email.
Trade in your fax machine and reams of paper for an online fax solution. eFax lets you send and receive faxes from your email, your user-friendly online account, or from the free mobile apps.
With eFax, you have two convenient ways to sign and send a fax no matter where you are. You can take a photo of your handwritten signature and drop the image onto a fax document. You can also simply swipe your finger across.
eFax lets you save your important documents conveniently in the cloud for easy access wherever you are. It is integrated with cloud storage apps like Dropbox, iCloud and Google Drive, so you can fax a document from anywhere. Simply grab a file from the cloud, attach it to your fax, and hit Send.